How to Fix a Leaking Roof at Home (DIY Guide)
We may earn a commission for purchases made using our links. Please see our disclosure to learn more.
A leaking roof can go from “just a small drip” to a costly mess pretty quickly. Maybe you’ve spotted a ceiling stain, heard water dripping into a bucket, or noticed damp insulation in the attic. Either way, you don’t want to ignore it. In this guide, you’ll learn how to fix a leaking roof at home, how to track down the source, what simple DIY repairs you can try, and when it’s safer to call a roofing pro.
First, Find Where the Roof Leak Starts
The water stain on your ceiling is only the ending point. The real leak may sit several feet away. Water often runs along rafters, decking, pipes, or insulation before it drips into your room.
Start inside the attic if you can access it safely. Use a flashlight and look for:
- Dark water stains on wood
- Damp insulation
- Moldy or musty smells
- Rusted roofing nails
- Daylight coming through the roof deck
- Water trails along rafters
If it is raining, you may spot the active drip faster. If the roof is dry, ask someone to run water gently over small roof sections with a hose while you watch from the attic. Work slowly from the lower part of the roof upward. Do not blast water everywhere at once, or you will turn the inspection into a guessing game.
Safety Comes Before Any Roof Repair
Let’s be honest: roofs are not forgiving. Even a “quick look” can become dangerous if the surface is wet, steep, mossy, or damaged.
Falls remain one of the biggest safety risks in construction, especially when workers use roofs, ladders, or scaffolding. That safety warning matters for homeowners too, because DIY confidence does not replace fall protection.
Before you climb, check these basics:
- Never walk on a wet, icy, mossy, or steep roof.
- Place your ladder on firm, flat ground before climbing.
- While climbing, always keep a steady grip and maintain contact with the ladder using three points of your body.
- Make sure an extension ladder rises at least three feet above the roof edge.
- Wear rubber-soled shoes.
- Keep tools in a belt or bucket, not in your hands.
- Have another adult nearby.
NIOSH also recommends placing ladders at about a 75-degree angle and inspecting ladders for damaged or missing parts before use.
If the leak is high, near the ridge, close to power lines, or on a steep slope, skip the hero scene. Call a roofer.
Common Causes of a Leaking Roof
Before learning how to fix a leaking roof, it helps to understand what usually causes the problem. A leaking roof does not always mean the whole roof has failed. In many cases, the problem comes from one weak spot.
The National Roofing Contractors Association explains that leaks can come from loose flashing or a damaged roof section, while total roof failure often points to poor installation, unsuitable materials, or major system breakdown.
Common leak sources include:
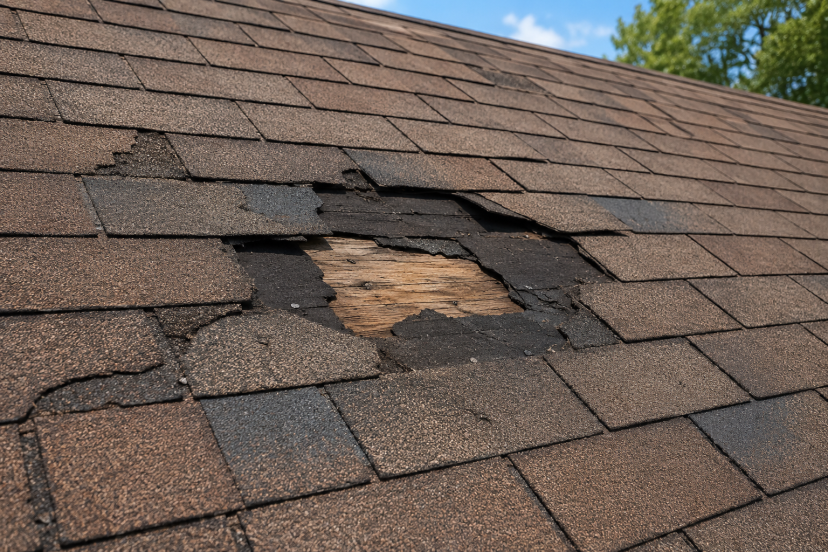
Damaged or Missing Shingles
Wind, heat, age, and storms can crack, curl, loosen, or tear shingles. Once the protective layer fails, water can reach the underlayment and decking.
Loose or Cracked Flashing
Flashing seals vulnerable roof joints around chimneys, valleys, skylights, walls, and vents. If flashing lifts, rusts, cracks, or separates from sealant, water can sneak behind it.
Worn Vent Boots
Plumbing vents often have rubber boots that dry out and split over time. These small cracks can create a surprisingly annoying leak.
Clogged Gutters
When gutters clog, water backs up under shingles or spills against fascia boards. That can lead to leaks, rot, and interior staining.
Roof Valleys
Valleys handle a lot of water. If shingles, flashing, or underlayment fail there, leaks can form quickly.
Nail Pops
Sometimes roofing nails rise slightly out of place. That small opening can let water enter, especially during wind-driven rain.
Knowing how to fix a leaking roof starts with spotting these common trouble areas before they turn into bigger water damage.
Tools and Materials You May Need
For a basic roof leak repair, gather your materials before you start. Running up and down a ladder for forgotten tools is not the kind of cardio anyone needs.
You may need:
- Roofing cement or roof leak sealant
- Replacement shingles
- Roofing nails
- Pry bar
- Utility knife or roofing knife
- Caulk gun
- Flashing tape
- Tarp
- Work gloves
- Ladder
- Flashlight
- Bucket
- Safety glasses
Use products designed for roofing, not random household caulk. Interior caulk may fail under UV rays, rain, heat, and roof movement.
How to Fix a Leaking Roof Step by Step
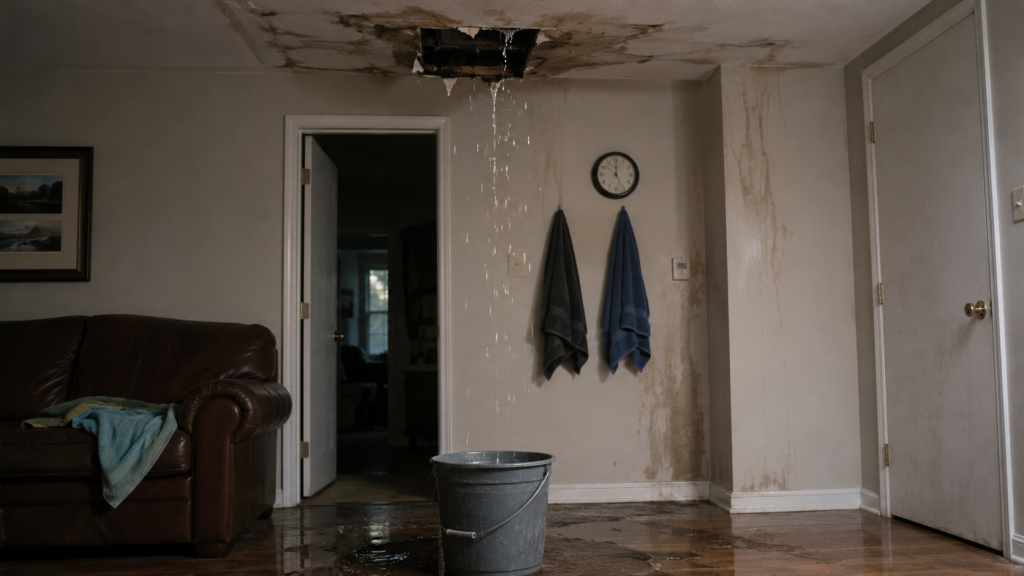
1. Control the Water Inside First
Before you fix the roof, protect your home.
Clear the area under the leak by moving furniture, rugs, electronics, and anything else that could get damaged. Place a bucket under the drip. If the ceiling bulges, water may be pooling behind drywall. If the ceiling starts to bulge, make a small opening at the lowest point with a screwdriver so the water can drain into a bucket.
It feels wrong, but controlled drainage can reduce ceiling collapse risk.
2. Trace the Leak From the Attic
Go into the attic with a flashlight. Follow stains, damp insulation, or water trails upward. Mark the suspected area with chalk or tape.
If you find soaked insulation, remove it after the leak is repaired. Damp insulation does not work as well and can trap moisture inside your home.
3. Inspect the Roof Exterior
Only inspect the roof if conditions are safe. Look for:
- Missing shingles
- Lifted shingles
- Cracked shingles
- Damaged flashing
- Loose nails
- Cracked vent boots
- Debris in valleys
- Clogged gutters
Stay on the ladder if possible. Many leaks can be spotted from the eaves or with binoculars.
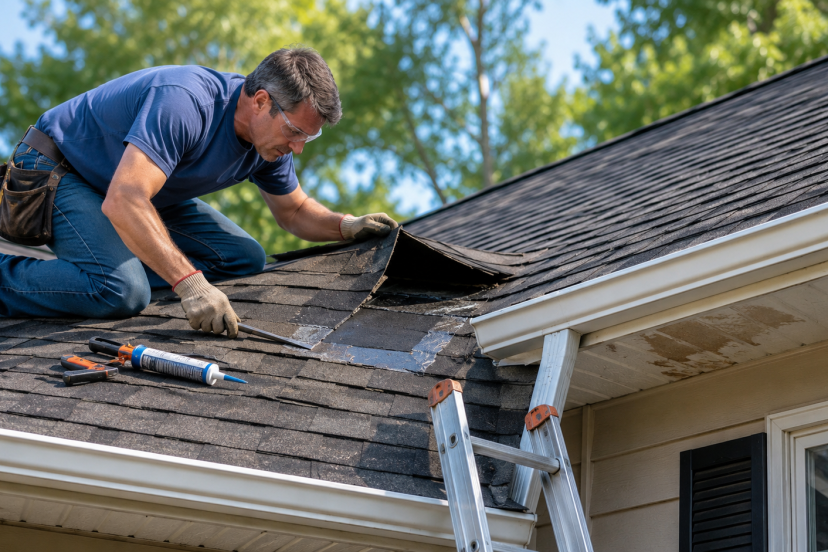
4. Replace a Damaged Shingle
If one asphalt shingle is cracked or missing, you may be able to replace it.
Use a flat pry bar to gently loosen the shingles sitting above the damaged section. Break the seal strip gently. Remove the nails. Slide out the damaged shingle. Slip the new shingle into place, align it with surrounding shingles, and fasten it with roofing nails.
Then apply a small amount of roofing cement under the lifted tabs to reseal them.
Do not overdo the cement. A clean repair beats a tar-covered mess every time.
5. Patch Small Cracks or Nail Holes
For tiny gaps, exposed nail heads, or small cracks, use roofing cement or roof sealant rated for exterior roof use.
Clean the surface first. Remove loose debris, dirt, and old brittle sealant. Feather the edges so water flows over the patch instead of catching on it.
6. Repair Loose Flashing
If flashing has pulled away around a chimney, wall, or vent, clean the area and inspect it closely. Small gaps may be sealed with roofing sealant. Loose flashing may need roofing nails or screws, depending on the material and location.
However, flashing repairs can get tricky. If the flashing sits behind siding, masonry, or multiple shingle layers, call a pro.
7. Fix a Cracked Vent Boot
A cracked vent boot is one of the most common roof leak issues. If the rubber collar has split, you can replace the boot or use a repair collar made for vent pipes.
To replace it, lift the nearby shingles, remove the nails, slide out the old boot, install the new one, nail it correctly, and reseal the shingles.
If that sounds like too much for your comfort level, this is a good job for a roofer.
8. Clear Gutters and Valleys
Sometimes the “roof leak” is really a drainage problem. Clear leaves, branches, granules, and mud from gutters and valleys.
Water should move off the roof quickly. If it pools, backs up, or spills under shingles, the roof will keep complaining.
Once the leak is fixed and your home feels dry again, you can shift from repair mode to style mode with elegant ideas from this guide to Parisian home decor.
Recommended Products for Roof Leak Repair
Here are five useful product types to consider for small roof leak repairs:
- Henry 208R Rubberized Wet Patch Roof Cement – Best for small roof patches, cracks, and wet-surface emergency repairs.
- Gorilla Waterproof Patch & Seal Tape – Good for temporary patches on cracks, gaps, and small openings.
- Grip-Rite Electro-Galvanized Roofing Nails – Useful when replacing asphalt shingles. These nails are designed for asphalt shingles, felt, and insulation board over wood substrates.
- Heavy-Duty Waterproof Tarp – Best for emergency coverage when rain is still coming and permanent repair must wait. Pick a heavy-duty tarp with reinforced edges and built-in grommets for easier securing.
- Dripless Caulk Gun – Helpful for applying roofing sealant around flashing, vent boots, and small roof penetrations.
Conclusion
Learning how to fix a leaking roof starts with patience, not panic. First, control the water indoors. Then trace the leak, inspect the roof safely, and repair the specific weak spot, whether it is a damaged shingle, cracked vent boot, loose flashing, or clogged gutter. Small roof leaks can often be patched at home, but safety matters more than savings. If the roof is steep, wet, high, badly damaged, or confusing, call a professional. A smart repair protects your home today, while regular inspections help prevent bigger leaks tomorrow.
FAQs
1. Can I fix a leaking roof myself?
Yes, if the leak is small, easy to reach, and the roof is safe to access. Simple DIY fixes include replacing a damaged shingle, sealing a nail hole, or patching a small crack. For steep roofs, flashing issues, or repeated leaks, call a roofer.
2. What is the fastest way to stop a roof leak?
Use a tarp, waterproof roof tape, or wet-patch roofing cement as a temporary fix. First, protect the inside with buckets and towels. Then patch the outside only if conditions are safe.
3. Why is my roof leaking but I cannot find the hole?
Water can travel along rafters, pipes, or insulation before it drips inside. Check the attic for water trails, then inspect vents, flashing, valleys, chimneys, and damaged shingles.
4. Is roof sealant enough to fix a leak?
Roof sealant works for small cracks, nail holes, or minor gaps. However, it will not fix rotten decking, poor installation, major damage, or failed flashing.
5. When should you inspect your roof for leaks?
Check your roof two times a year, and give it another look after heavy storms. Look for missing shingles, loose flashing, clogged gutters, ceiling stains, and attic moisture.